

|
|
|
||||||||
|
|
|||||||||
| Home | Forums | Register | Gallery | FAQ | Calendar |
| Retailers | Community | News/Info | International Retailers | IRC | Today's Posts |
 |
|
|
Thread Tools |
|
|
#1 |
|
kjw guarder steel mag catch mod
THIS MOD WILL MAKE YOUR OLD MAG CATCH ABLE TO TAKE THE GUARDER METAL REPLACMENT AND INCREASE THE AIR SEAL BETWEEN YOUR MAG AND BLOW BACK UNIT AND IN MY CASE IT REMOVED A LOT OF MAG WOBBEL!
DISCLAIMER I TAKE NO RESPONSBLITY IF YOU DAMMAGE YOUR GUN IN THE PROSESS OF THIS MOD I DID THIS MOD 2 MONTHS AGO AND PUT ABOUT 100 MAGS THREW IT AND THEIR IS NO WAER ON THE MAG CATCH AT ALL AND IS STILL FIREING GREAT AND STRONG SO IT HAS BEEN TESTED. Well since receiving my Kjw form mark Anderson (A&A air soft the week of their closing) I have enjoyed this gbb. It suffered from the typical wear, stock trigger spring breaking, but that wasn’t the least of the problems the first time my stock mag catch stopped working was the worst! It was due to the plastic maring up so much it rounded the corner until the downward pressure of the gas coming out of the mag would allow it to pop out of the mag catch and allowing it to fall down. Well I was utterly pissed so to speak, so i looked and found out triador could get me in tm ones (plastic) with a few mods to the over all height it was good as gold. well they suffered the same fate about 400 reloads in boom did the same thing, But I was in luck i order about 3 so i was prepared. But then the search began to get a metal one. I knew wgc sold a few after market one but they were very expensive 30 40 bucks and wgc shipping was another 30 so it wasn’t worth it at the time but later on and more detailed research led me to find they had recently acquired and started to stock a guarder version which claimed to be a kjw drop in. but i knew other wise, but since I had access to a mill and other fab shop tools i wasn’t worried if it required major modification. so once deciding I wanted it badly I looked at wgc they wanted 50 bucks for a 10 dollar part shipped! They had raised they shipping dam assholes!!!!!! so I went in search to local repetitive to get me the part. (I will with hold his name until I receive confirmation form him to disclose his asc title as I don’t think he wand’s tons of underage ppl messaging him for parts but all AV'ed ppl pm me and ill be glad to disclose). in the end he was able to get it for me and I got it much cheaper below the 30 dollar range. So once my package arrived a bit later I opened up and found out it was to kjw spec some what with a micormiter . but the major problem was the spring nub was well undersized for the kjw frame. So I knew a bit of either mag catch modification was needed or a frame mod so I chose the frame way as it was much easier it also needed a bit of fitment on part of the mag catch witch i will outline here. All it needed was a sanding dreameal bit and either a dreamal or a drill. TOOLS -dremel/ drill -a dremel sanding stick after looking it up i found out it was a chain saw shapening stone the 455 Chain Saw Sharpening Stone to be exzact as it fits into the little crevise that you need to sand properly in relation you can get away with the 453 Chain Saw Sharpening Stone too it works too but i used the 455 as it sanded the metal great! link from dreamls site http://www.dremel.com/en-us/Attachme...l.aspx?pid=455 Step one I grabbed my gun cleared the chamber checked for rounds removed mag and slide   Step two Remove grip's and grab the triger bar spring so it dosnt get lost put theys items in a plastic bag for safe keepign so you dont losse them also remove the stock kjw mag catch. i also removed the slide release but in the picture it isnt removed!  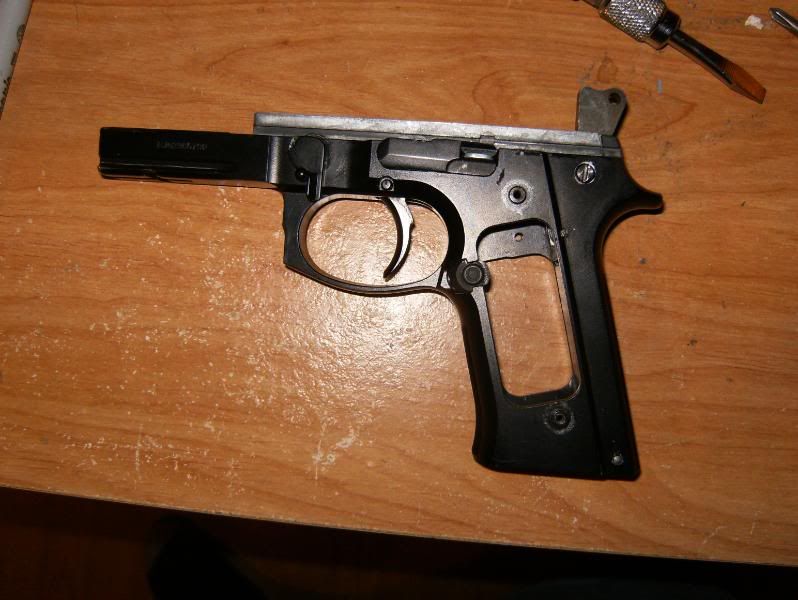 Step three Remove the spring from the mag catch and keep it safe as you will need it for the new one! 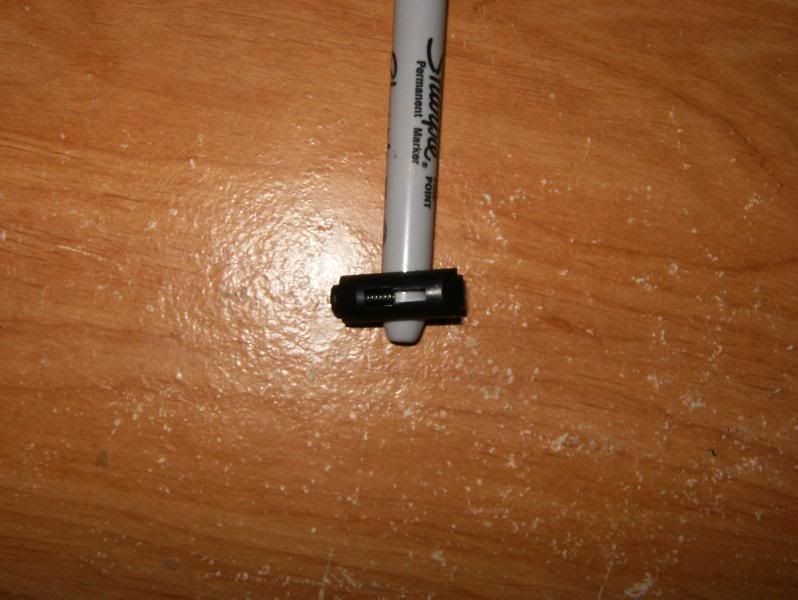 Step four preping the mag catch to fit now i said it was to spec with the kjw but i like my mag catch to not be stiff so i lined it up as if i was putting it in and sanded down theys parts so i took a bit off the top and the bottom as it makes it easyer for remaoval and inserting later on i also took a bit off. 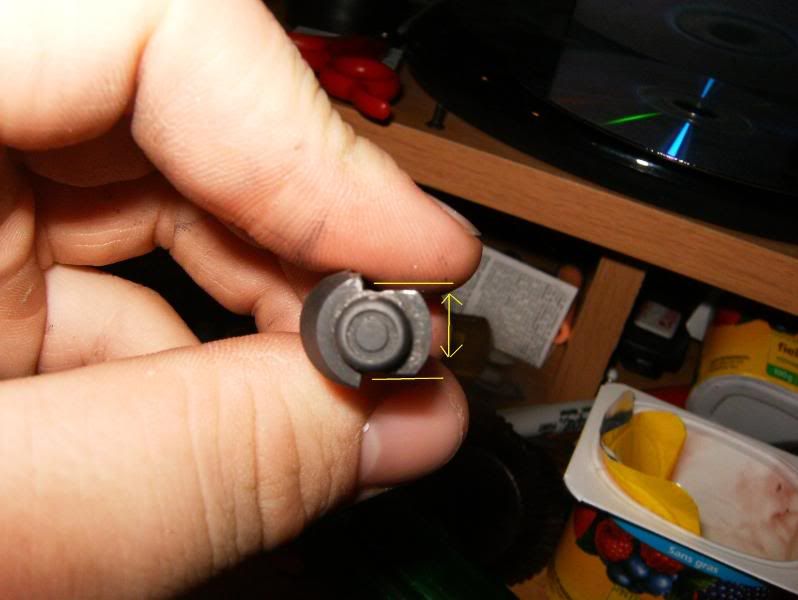 Step five We are still preping the mag catch we are going to take a bit of the height off it in this direction now and were i put to arrrow and that little box is were you should sand a bit off too. 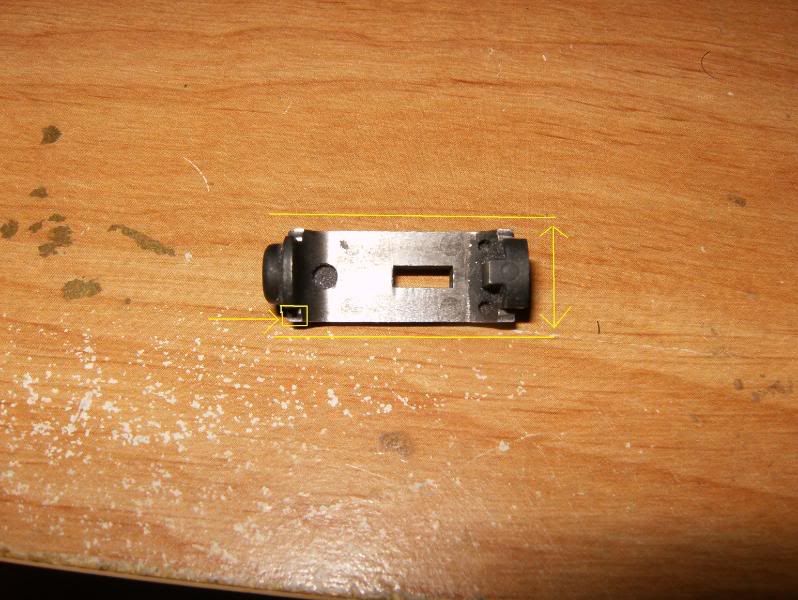 Step six step six is were you insert it in to see if it fits in a bit dont be suprised as it wont slide all the way threw as it will hit the nub that needs to be sanded off in the next step. you insert the mag catch a bit like showed in this picture and you can lip the mag catch over and test it the outher way to so you can inshure that both side fit properly. 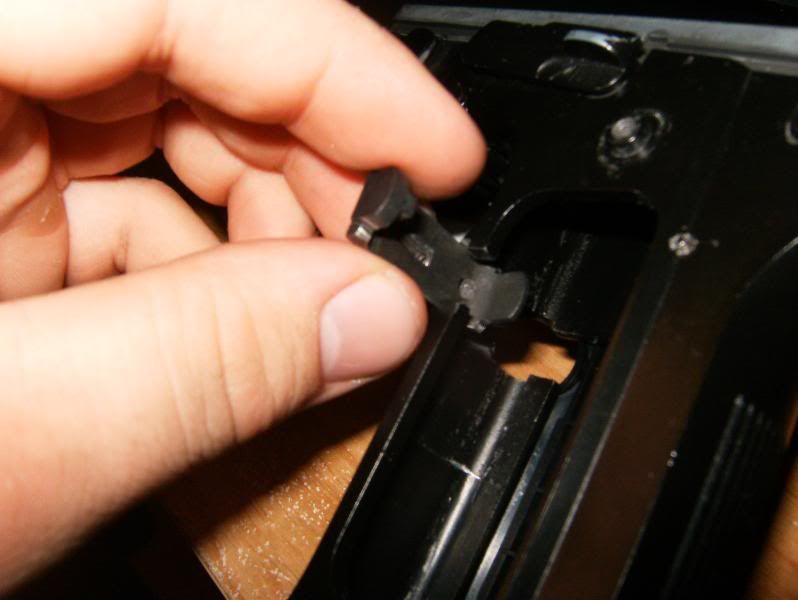 Step seven were now going to go to the frame of the pistol for this one and start modifying it so it can fit properly. your going to take you dremal with the sanding bit or the drill with the bit put in the chuck and gind at this nub after taking a bit off one side do it to the outher side to even it out and then test your mag catch to see if it fits in.  Step eight now that you have either got it sanded down to what is pictured in step seven or got it in and its a bit tough to push in and out i suggest trying to use knormal force and try to work it in but it its to tight remove it and repeat setps four and five until it fits as this is what makes it slide easyer. Step nine put a bit of lube on the back side for the first time to help it along and then reasemble if you fall into isshues with the mag not comming out easyly then you should look at were the mag catch it self catches on the magazine and remove the burr on the magazine if the problem were the magzine follwer gets stuck sand down the part facing the magzine pictured here and test and repeat until the problem is gone.(sanding in the green box area only) 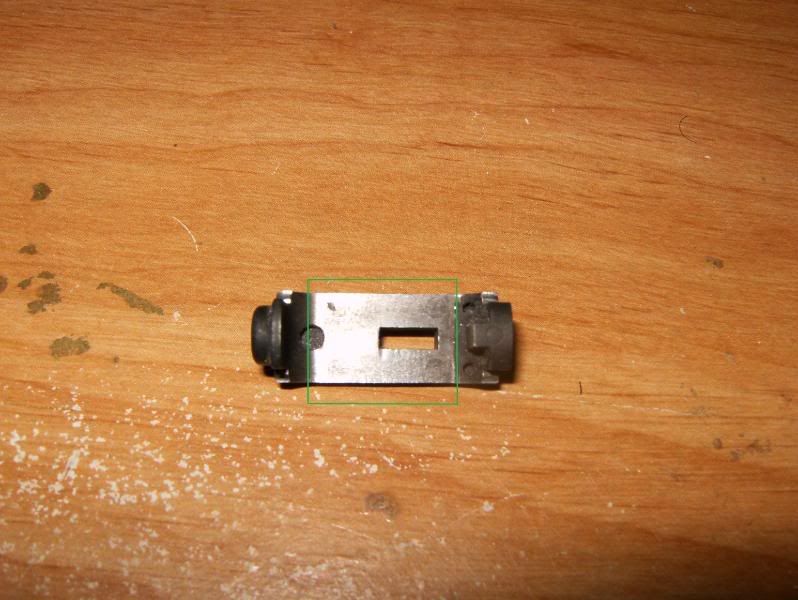
__________________
MY COLLECTION AEG M4 coustom full metal with king arms metal body //\\ Galaxy MP5 PDW GAS/SPRING KJW M9 FULLY UPGRADED //\\KWA FULL SIZE USP //\\ TF MAC11 GEAR Coyote Brown CIRAS Last edited by jesster202; January 19th, 2009 at 22:50.. |
|
|
|

|
|
|
#2 |
|
And their she is ladies and gents my first modifcation tutoiral for the kjw!
__________________
MY COLLECTION AEG M4 coustom full metal with king arms metal body //\\ Galaxy MP5 PDW GAS/SPRING KJW M9 FULLY UPGRADED //\\KWA FULL SIZE USP //\\ TF MAC11 GEAR Coyote Brown CIRAS |
|
|
|

|
|
|
#3 |
|
Tys
|
Jesse...awesome write up...
But no one in their right mind, if they compare the wording/writing of your other posts, is going to believe that you wrote this one...  Tys |
|
|

|
|
|
#4 |
|
lol thanks i took my time and spell checked it 2 times so it would be an usable guide to others.
__________________
MY COLLECTION AEG M4 coustom full metal with king arms metal body //\\ Galaxy MP5 PDW GAS/SPRING KJW M9 FULLY UPGRADED //\\KWA FULL SIZE USP //\\ TF MAC11 GEAR Coyote Brown CIRAS |
|
|
|

|
  |
|
||||||
| Bookmarks |
|
|
 |